Thursday, July 30, 2015

The Traditional Double-Iron Wooden Plane is Back


In 1926 the last American wooden plane factory, The Sandusky Tool Company, closed its doors. Since that date, traditional double-iron woodies, to the best of my knowledge, have not been commercially made in North America. Today I'm taking a big step toward addressing that unfortunate shortfall with the official formation of Voigt Planes


I started making planes almost 15 years ago. My earliest efforts were laminated planes, but I soon gravitated towards more traditional designs. My planes are loosely based on those in the Seaton tool chest and other late 18th-century/early 19th-century planes. They are bespoke planes, made one at a time in my small workshop. A few basic power tools are used for rough dimensioning, but for the most part these planes are made by hand: Finished surfaces are produced with chisels, planes, gouges, floats, and rasps.

What follows is some information about the design and construction of my planes, what planes are available right now, and timelines for additional orders.


The Cutting Irons


One of the biggest obstacles to making traditional planes is finding appropriate irons. My search ended when Rob Lee of Lee Valley, the eminent Canadian woodworking manufacturer, agreed to make tapered, slotted irons to my exact specifications. I owe a huge debt of gratitude to Rob, and to his R&D director Rick Blaicklock.

The dimensions of these irons are closely based on those of typical 19th-century irons: They taper from approximately 3/16" at the cutting edge to 3/32" at the top.


The irons are O1 high-carbon tool steel, hardened to 58-60 RC. They take and hold a wonderful edge. They come with a 25° primary bevel, then I flatten the backs add a very small 30° secondary bevel. These irons are ready to work, right out of the box.

The Cap Irons


My cap irons (or chipbreakers, if you prefer) are unlike any other on the market today. Most modern cap irons have a bend in the middle and a single flat bevel. My cap irons, like all 18th- and 19th-century cap irons, hook sharply at the bottom and are gracefully curved to facilitate shaving escapement. These cap irons are made in-house.


The Wooden Stock


Like most traditional planes of the last 300 years, mine are made of quartersawn beech. The bark side is normally oriented down, though I will occasionally make exceptions to this rule as the situation warrants. If the grain slopes, it typically slopes from toe to heel.

 The Mortise and Escapement


The earliest double-iron planes had elegant, efficient mortises and escapements that required a great deal of labor-intensive handwork to produce. Later 19th-century planes were often made more cheaply, in large factories that used unskilled labor. My planes return to the older method of construction.


 Finishing Touches 


My planes feature the traditional finish details of period planes: Bold long chamfers, stopped chamfers, and gouge cuts. When the plane is done, I test it thoroughly, finish it with oil and wax, test it again, and send it out into the world.


What's Available Now


Right now, I have a batch of coffin smoothers available for purchase. Please visit the "planes" page on my website for a description and pricing information.

When this batch is gone, and for all other models (jack planes, try planes, etc.), I'm currently anticipating four to five months to fill new orders. This isn't a cheesy, infomercial attempt to get you to buy right now: it's just the way it is, and has more to do with supply lines than anything else.  As time goes on and work flow becomes more predictable things may change, but right now that's where we are. If you are interested in ordering a plane, use the email link in the upper right corner of this post. Feel free to also visit the "how to order" page on the website for more information.

For a couple of years now, I've made planes for customers on a part-time, informal basis, strictly by word of mouth. The new website is part of an effort to take this business to the next level, and to reestablish the traditional double iron wooden plane as a viable option for hand tool woodworkers. I can't predict where this is going, but I plan to enjoy the journey.

If you have thoughts or suggestions, feel free to leave a comment, and thanks for looking.


Tuesday, July 21, 2015

Sculpting the Heel of a Coffin Smoother

One of the most enjoyable parts of making a coffin smoother is shaping the heel. I favor the design popularized by Old Street Tool (formerly Clark & Williams), a design that is modeled on early 19th century examples. Other traditional planemakers, such as Caleb James, also use this form. The combination of sculptural curves and hard lines is both attractive and functional. A lot of modern, Krenov-style wooden planes have heels that look like the back of race cars, with no hard edges. It's an attractive look, and it's probably quick and easy to shape on a belt sander, but edges serve an important purpose--they orient the hand and prevent slipping.

So here's a little bit about how I shape the heel. I'm not sure if this is how other folks do it, but this way works well for me.

The first step is to make the stopped chamfers and gouge cuts, exactly as I make them on the front of the plane. Even though 90% of the chamfers are obliterated in the next step, I still have to make them in order to lay things out properly.

The next, and probably most important step, is to lay out the four arcs. There is one on the heel, which is set about 3/8" below the top of the plane, so that the top of the arc is level with the long chamfers.


There is one on the top of the plane, also offset about 3/8".


 And there is one on each side, connecting the long and stopped chamfers.


Then I go at it with chisel and mallet. A lot of people might be tempted to reach for a rasp at this point, but a chisel is far faster, and your rasps will last longer if you don't do unnecessary hogging with them. I knock off big slices at about a 45° angle, then pare more carefully to follow the curve. I try stay about 1/8" or a little less from the layout lines. When I'm done, it's ugly but about 90% of the material has been removed.


Next, I use a coarse rasp to remove the facets and get to within a 1/16" of the layout lines. One of these days, I am going to leave a plane in this state. I really like the rough, visceral texture.


After the coarse rasp, I move to my finest rasp, which is sort of a medium-fine rasp, nothing special. This removes the deep scratches and gets me within about 1/64" of the layout lines.


At this point, the ideal tool would be a super fine-grained rasp from Auriou or Liogier, but lacking that, I move to 150-grit sandpaper. I try to do as little sanding on a plane as possible, but this is one place where it's hard to avoid. I'm very careful about sanding right up to, but not over, the lines. I'll then follow the 150-grit with a few passes of 220-grit.


Add a coat of finish, and it's done!


Thanks for looking!


Sunday, June 28, 2015

Some Alsatian Tools and Furniture

Recently, my wife and I spent a few days in Alsace. One of the highlights was a trip to the wine village of Mittelbergheim. We were there for the wine and scenery, but there was an unexpected detour when we walked past this sign:

Note the horned plane, symbol of a joiner (or menuiserie in French). We poked our heads in and asked if we could look around. Instead, we got a 40 minute tour of the shop from Henri, the owner (sadly, I did not get a picture of him).

Most of the shop was given over to production power tools (a fact that seemed to sadden Henri--he said it was no fun any more), but there were a few hand tool highlights. Here's an old bench:

This bench is Continental-style, with recessed base and tool tray, but it has a leg vise, more characteristic of French benches. The other benches in the shop had shoulder vises. When I asked Henri about this, he said "well, we were three times part of Germany."

At one point, I noticed an old horned smoother and asked Henri about it. We briefly discussed handplanes, and a few minutes later, he gave me one! What a wonderful gift!


The most interesting thing about this plane is the French-style double iron, which uses a complicated screw mechanism to regulate the distance between chipbreaker and iron. I've seen pictures of these irons, but never expected to own one.


Interestingly, the chipbreaker does not clamp to the iron; it just nestles in the chipbreaker slot. There is a little "nipple" at the top of the slot that fits into a detente in the top of the screw. The mechanism is quite precise: I would guess there is only about .003" worth of play.


The same family also ran a cabinet-making shop (or ebenisterie). They sold very stylish modern furniture. I quite like this chair:


They also had a small museum dedicated to traditional tools. Most interesting were four display boards of various hand tools. First, menuiserie:


Then ebeniste:


Then charpentier (carpenter):


And finally tonnelier (cooper).


There was a great wheel lathe:


And an enormous cooper's plane.


The cutting iron of the cooper's plane was huge, more than 6" wide (my shoe conveniently shows the scale).


Finally, here's a Rouboesque frame saw, with sister-in-law and wife:


While visiting several of the town's wineries, I noticed that they all had the same style of chairs. Apparently, these are traditional Alsatian chairs.


What is really interesting about these is the joinery. Christopher Schwarz has recently written about the use of sliding dovetail battens in medieval furniture. These chairs combine the battens with a wedged tenons to secure the back to the seat.


The tenon on the bottom of the chair back goes through both the seat and the sliding battens, and is wedged in place with a key.


All in all, it was a pretty fascinating day. And the wine was yummy too!

Friday, June 26, 2015

My Fanback Turned into a Birdcage!

Recently one of my favorite bloggers, D.B. Laney, posted a "gallery of unfinished work"--piles of unfinished tables and chairs. When I saw that, I didn't feel quite so bad about my unfinished chair(s), which have been collecting dust for quite a while, due to my obsession with building traditional handplanes. But I recently got off my duff and managed to get one of the chairs glued up.

Originally, I planned to build a sort of Modernist fanback Windsor, along the lines of Nakashima's New Chair or Moser's Eastward chair. But after I mocked up the chair (seen in this post), I was pretty underwhelmed with the result. I hemmed and hawed and thought it over for weeks, and then I finally did something radical: I ripped my crest rail into two halves and made a Modernist birdcage Windsor instead. Haven't put any finish on it yet, but here it is, all glued up:


Darn it, something got in the way in this picture!


I'm viewing this chair as a prototype--I want to make some changes for the next one. The biggest change will be to add an inch between the two crest rails. Also, the stretcher tenons have shoulders, and I hate those, so I'll get rid of them. There are a few other minor changes as well. But overall, I'm pretty satisfied.

Now I need to figure out what to finish the chair with. I'll have to mull that over for a while…

Tuesday, June 9, 2015

Everything You Need to Know is Free


I try not to do "opinion pieces" on this blog, but today I am a little more exercised than usual by the profusion of people who want to sell you basic woodworking instruction and advice.

The Intertubes are awash with gurus, hucksters, and opportunists who want to sell you hand tool videos, online subscriptions, courses, plans, and who knows what. A lot of these people are not experts, and all of them are recycling the same projects and techniques that have been around for a century or more. Some of them have mastered the art of making you feel, for $19.95 a month, that you are a part of a select group. The hipster guy with dreads and new age beats, and the crusty English guy with his bucolic reminiscences of apprenticeship, are both selling you the same thing: Atmosphere. It's impressive, really.

So here is my advice to any beginning hand tool woodworker: Everything you need to know is free.

The best place to start is your local public library. You do have a library card, right? Because they would love to have your business. You're likely to find all sorts of things that aren't online. Of course, online resources are great too. There are lots of public domain books. There are blogs and youtube videos. Woodworking publications like Fine Woodworking and Popular Woodworking have tons of free resources.

But the most important thing is practice. Do you want to learn to cut dovetails? You don't need to buy a bunch a videos. You just need to read a couple descriptions of the process. You may find it helpful to watch a couple free 3-minute videos by Rob Cosman, Frank Klausz, or others (Kari Hultman has a nice one as I recall). Then you need to get some wood and practice, over and over, until you are proficient. The process for cutting dovetails hasn't changed for a couple centuries. Nobody has any magic  bullets that will substitute for hands-on, hard knocks learning.

Do you want to learn to sharpen a saw? Same deal. You don't need a course or a video. Head over to Pete Taran's Vintage Saws website and read the sharpening guide. Matt Cianci (on WK Fine Tools) and Daryl Weir have good online tutorials as well. Then make yourself a saw vise out of some scrap, get some files, and practice. Your first saw will probably look like crap. It will probably cut pretty well though. After a dozen saws, your efforts will be almost indistinguishable from those of the people who charge $50 per sharpening.

Now, am I saying you should never buy a book or a video? Of course not. I love buying those things, if it's something special, or just something that I think will be a fun read. But please, don't give some guy your money because you think only he can teach you to chop mortises and saw tenons.

I know I've included no links and very few specific titles in this post. Tough love, baby. Do your own research. To learn to make almost anything, you will have to pay, with effort, perseverance, frustration, and even temporary failure. But you don't have to pay with money. Save your money for tools and wood.

Sunday, March 1, 2015

Plane-making videos (and other resources)


When I first started making traditional planes, there wasn't much information out there. The only book on the subject, John Whelan's Making Traditional Wooden Planes, was long out of print. There was plenty of information on making "Krenov"-style planes, but not on making traditional abutment-style planes (a much tougher task). Larry William's has a great video, Making Traditional Side Escapement Planes, but it unfortunately doesn't cover bench planes.

Well, things are looking up. Whelan's book is now back in print. Caleb James has published a bunch of scaled drawings for various planes on his blog. A few other bloggers, including me, have put up tutorials. And most recently, David Weaver has put up a mammoth series on making a traditional double-iron plane on YouTube.

To say that these videos are comprehensive would be an understatement. There are over 20 videos, and I'd guess total running time at 10 or 12 hours. Every aspect of making a double-iron plane is covered, from the tools you need, to wood selection and grain orientation, to every step of construction. At the end, there are a couple videos showing the plane working really well.

If you are looking for a slick, fast-paced production, these videos are not for you. This is one guy shooting the videos on his Iphone, one take, no editing. But that's good in my book. There is a tremendous amount of authenticity in these videos, like the utterly charming moment when his daughter wanders in to get her bike helmet tied. At one point, Dave gets the mouth of his plane a little larger than he wanted, which on a double-iron plane is a cosmetic blemish that doesn't harm the function one bit. He proceeds to spend the next 20 minutes beating the crap out of himself for this minor error! It's really painful to watch, but it's also very real, an honest-to-God person obsessing about his woodworking project, not some slick salesman trying to convince you how easy it will all be. There is no effort to hide his mistakes, and he makes a few, just as any experienced woodworker would, but none of them are fatal.

There are a few things Dave does that I could quibble with, but it's pretty minor stuff. All in all, these videos are a great resource. If you've ever wanted to build a traditional double-iron plane but were intimidated, I recommend you watch these videos, and maybe get a copy of the Whelan book, and you should be all set. If you want to start at the beginning, here's the first video.

Incidentally, Dave also wrote the definitive article on how to set a cap iron. If you thought the cap iron (or "chipbreaker," if you prefer) is just for holding down the blade, think again. Read the article, try it out, and before long you'll be leaving tearout in the rear-view mirror.


Thursday, September 11, 2014

More mockups, and some tenoning strategies

Over the last few days I mocked up the top half of the chair I'm working on. This chair will have 7 narrow spindles, plus two somewhat beefier stiles on the ends. So the first step was to taper the bottom ends of the stiles to match my 5° reamer. Initially, I tried to do this freehand; the result was not bad but it took forever. So, I decided to make  a tapered tenon reamer. This was easy to do and worked well.
The first step was to bore and ream a hole in a piece of scrap. I reamed at slight angle, squaring the body of the reamer to the side of the scrap piece.


Then I planed the side until I opened up a slot of even width,


and then cleaned up the slot and bolted a plane frog on.


Peter Galbert, in this post, recommends using a Bedrock frog, which is kind of funny because Bedrock anything sells at a premium on the used market. I'm sure a plane Jane frog would be fine, but it just so happens that I have a bunch of spare Bedrock parts--some Ebay criminal sold me a dud years ago that I never got around to fixing up.

The tenoner worked great, although I fouled up the hole on my second try and had to redo it. The lesson I learned is that the tenoner works best--at least for me--as a finishing tool, after I had already shaped the tenon pretty close to its final size.

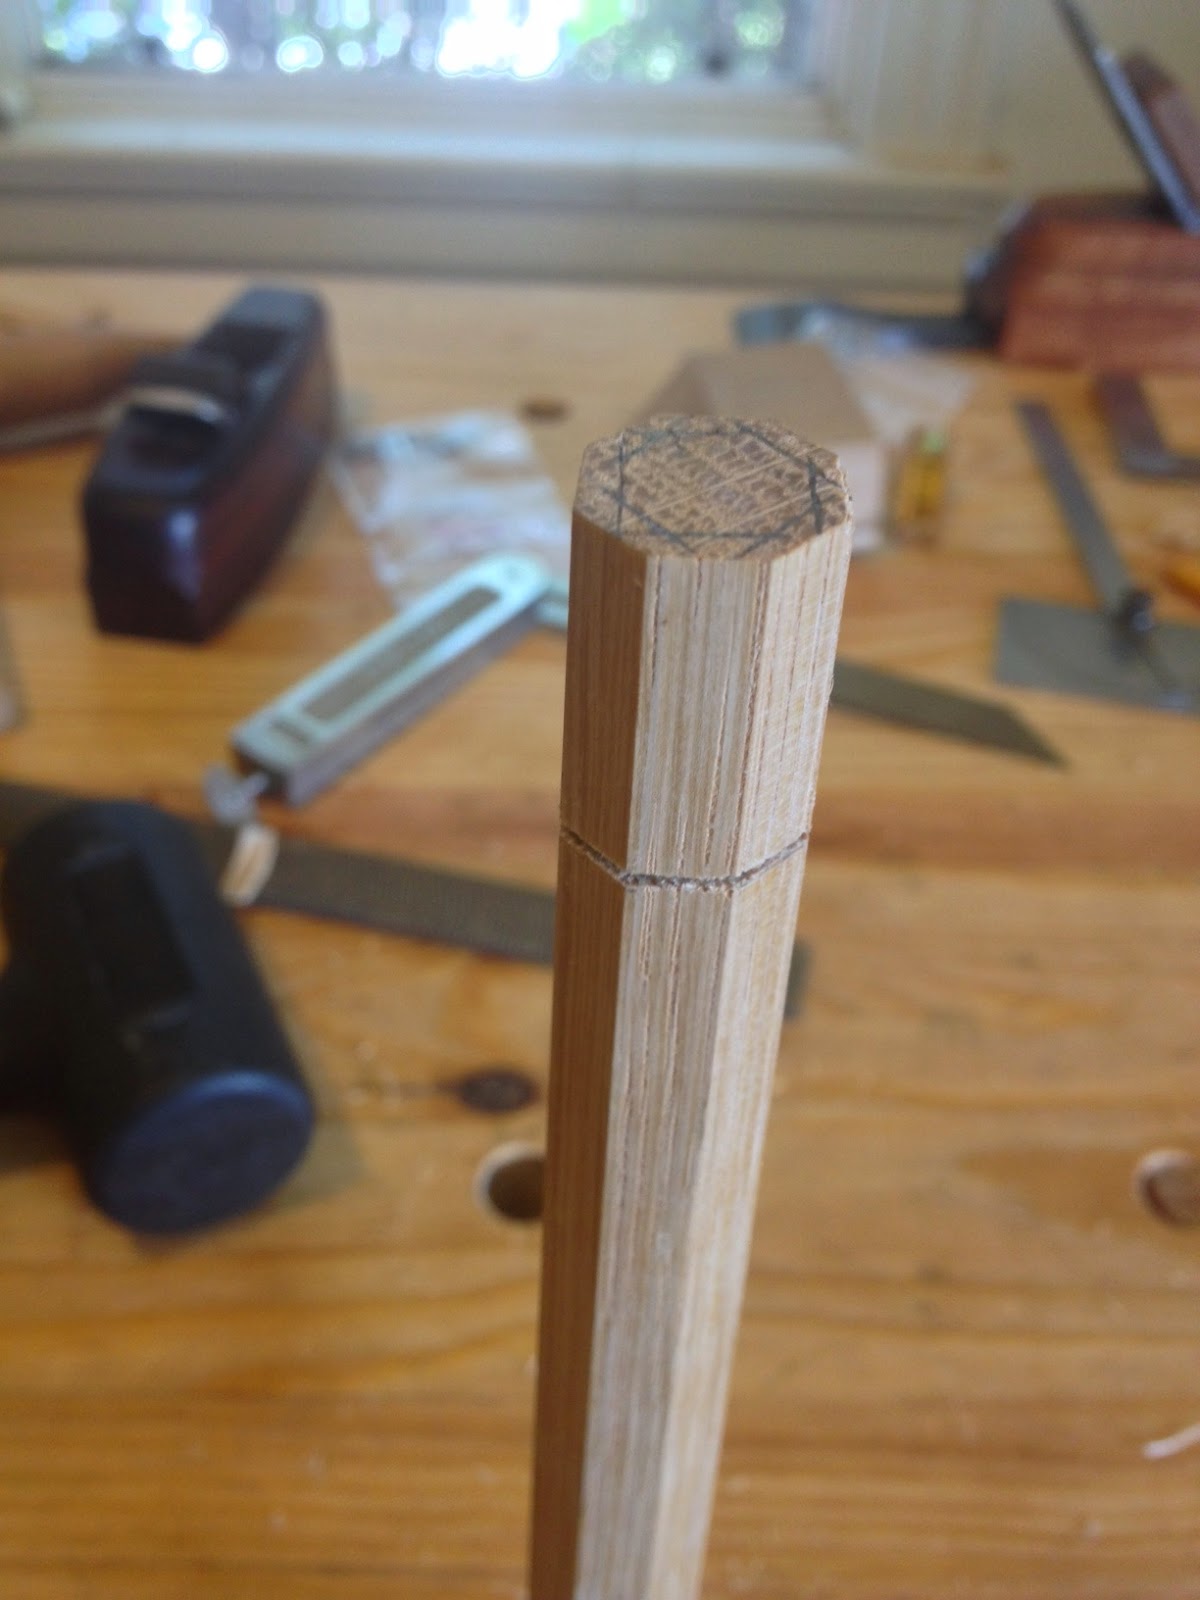
The other ends of the stiles have shouldered, untapered tenons. I found these much easier to cut freehand. With my stiles still in octagonal form, I marked off the tenon with a combination square and cut the shoulder all the way around with a backsaw.


Then I just used a chisel to split off the waste.


I split conservatively, and then pared to the lines. I concentrated on making as accurate a square section as I could first.


Then, I made an octagon, and finally shaved the corners off the octagon to get a pretty nice round tenon.


I didn't want to drill into one of my nice steam-bent oak crest rails without experimenting first, so I mocked up a rail out of cheapo spruce construction lumber. I just traced out the pattern twice on a 2 x 6, and laminated the pieces together. Here was my initial mockup, with no spindles, just the stiles.


I'm really glad I did this. I learned two big things. First, it was too high. At this height, the top of the crest rail would finish at about 37" high. It was really uncomfortable, but dropping it down to around 35.5" made a big difference. 
Second, the crest rail initially had the same backward-sloping angle as the stiles.  This caused the bottom of the crest rail to dig into my back. Angling it forward a little helped a lot. I redrilled the holes and postioned the spindles approximately where I'd like them to go:


The spindles obviously need to be thinned a lot. But this looks good enough that I'm ready to start working on the real thing, finally...