Thursday, September 11, 2014

More mockups, and some tenoning strategies

Over the last few days I mocked up the top half of the chair I'm working on. This chair will have 7 narrow spindles, plus two somewhat beefier stiles on the ends. So the first step was to taper the bottom ends of the stiles to match my 5° reamer. Initially, I tried to do this freehand; the result was not bad but it took forever. So, I decided to make  a tapered tenon reamer. This was easy to do and worked well.
The first step was to bore and ream a hole in a piece of scrap. I reamed at slight angle, squaring the body of the reamer to the side of the scrap piece.


Then I planed the side until I opened up a slot of even width,


and then cleaned up the slot and bolted a plane frog on.


Peter Galbert, in this post, recommends using a Bedrock frog, which is kind of funny because Bedrock anything sells at a premium on the used market. I'm sure a plane Jane frog would be fine, but it just so happens that I have a bunch of spare Bedrock parts--some Ebay criminal sold me a dud years ago that I never got around to fixing up.

The tenoner worked great, although I fouled up the hole on my second try and had to redo it. The lesson I learned is that the tenoner works best--at least for me--as a finishing tool, after I had already shaped the tenon pretty close to its final size.

The other ends of the stiles have shouldered, untapered tenons. I found these much easier to cut freehand. With my stiles still in octagonal form, I marked off the tenon with a combination square and cut the shoulder all the way around with a backsaw.


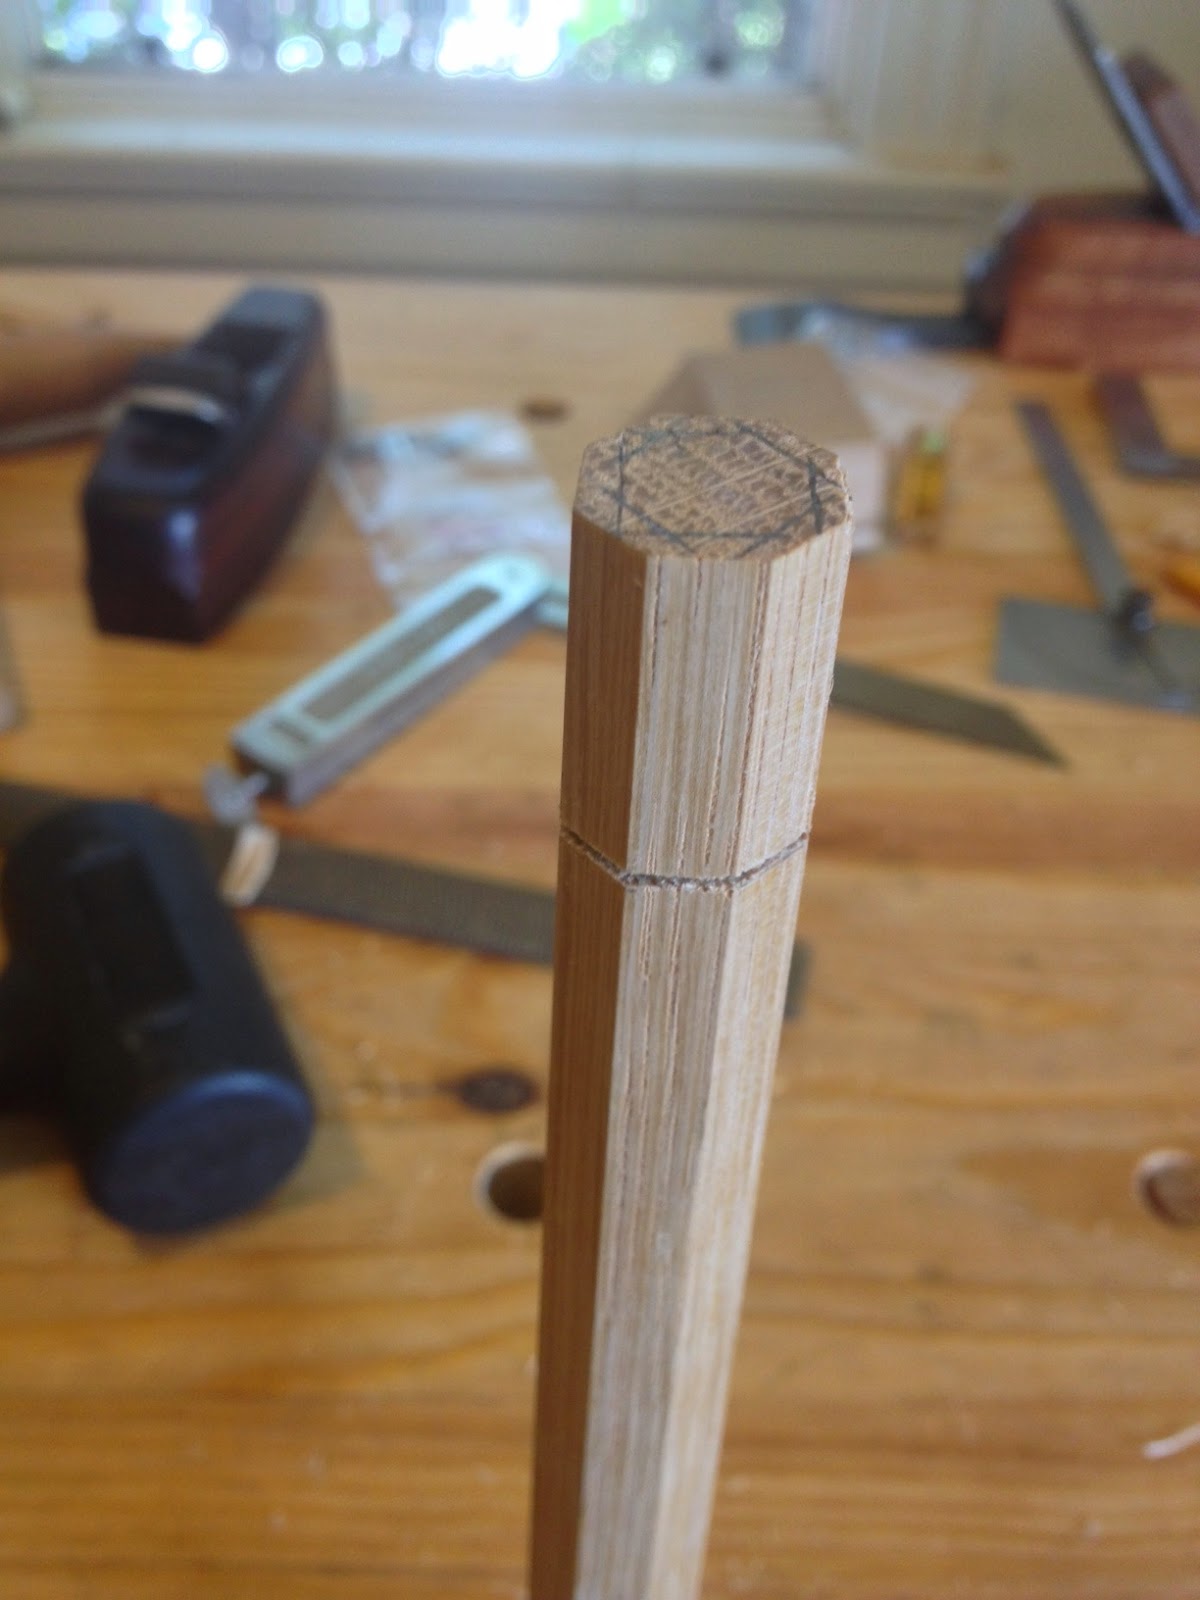
Then I just used a chisel to split off the waste.


I split conservatively, and then pared to the lines. I concentrated on making as accurate a square section as I could first.


Then, I made an octagon, and finally shaved the corners off the octagon to get a pretty nice round tenon.


I didn't want to drill into one of my nice steam-bent oak crest rails without experimenting first, so I mocked up a rail out of cheapo spruce construction lumber. I just traced out the pattern twice on a 2 x 6, and laminated the pieces together. Here was my initial mockup, with no spindles, just the stiles.


I'm really glad I did this. I learned two big things. First, it was too high. At this height, the top of the crest rail would finish at about 37" high. It was really uncomfortable, but dropping it down to around 35.5" made a big difference. 
Second, the crest rail initially had the same backward-sloping angle as the stiles.  This caused the bottom of the crest rail to dig into my back. Angling it forward a little helped a lot. I redrilled the holes and postioned the spindles approximately where I'd like them to go:


The spindles obviously need to be thinned a lot. But this looks good enough that I'm ready to start working on the real thing, finally...

Friday, September 5, 2014

Prototyping and design

The chairs I am working on are not traditional Windsors--they're what you might call Modernist Windsors, with clean lines and most of the ornament stripped out. There are a number of chairs in this style that I like, such as Nakashima's New Chair, Moser's Eastward chair, and Curtis Buchanan's Patra's chair (as well as his and Peter Galbert's more traditional birdcage chairs). But there's no blueprint or scaled drawings to follow, so I'm making it up as I go along. This can get a little overwhelming, so I decided to do some prototyping. I got a couple cheap Southern yellow pine boards from the Home Depot and made a practice seat (my real seats will be made of elm).

The traditional tool for roughing out a seat is an adze. I don't have one, and they're not cheap. I do, however, have this:


It's a Lancelot "chainsaw" carving attachment for a 4.5" angle grinder. I bought it 7 or 8 years ago and never used it. I think it was only about 30 bucks. Boy, did it come in handy. I was able to rough out my first seat in about 15 minutes. Like a router, it tends to self-feed if you move it in the wrong direction, though not nearly as bad as a router does. But once you figure out the right direction, it's extremely controllable. Of course, it leaves a very rough surface.


But another half hour with the travisher and it was looking pretty good for a first try. And most important, I know what I need to do to make the first real seat a lot better than this.


The real seats will get scraped and probably sanded, but this was good enough for a prototype.

Next, I bored and reamed the seat holes. I'm using 14° for both the rake and splay. I got these numbers from a drawing of a birdcage chair in John Kassay's wonderful book, The Book of American Windsor Furniture, which has dozens of elaborate, scaled drawings. Using the tables in Drew Langsner's The Chairmaker's Workshop, I converted these angles to a 45° sighting angle and 20° resultant angle.


I forgot to take a picture of the reamer in use (the one I showed in this post), but suffice it to say that it works great. It cuts slowly, but that's an advantage, because it gives you multiple chances to dial in the right angles. My first hole was a little wonky--not surprising since I'd never done this before--but the other three were pretty much dead on.


This looks enough like the bottom half of a chair that I think I can tackle the real thing. But first, I'm going to try mocking up at least the outer spindles and the crest rail.